Morning, AMEPGADGET readers — it’s August 23, 2025. If your garage still needs a key fob or a long walk to open, a smart garage door opener might be the quickest upgrade you can make for daily convenience and real peace of mind. Whether you want remote control from your phone, automatic closing at night, or secure delivery access, there’s a solution that fits a single weekend install.

Why go smart with your garage door?
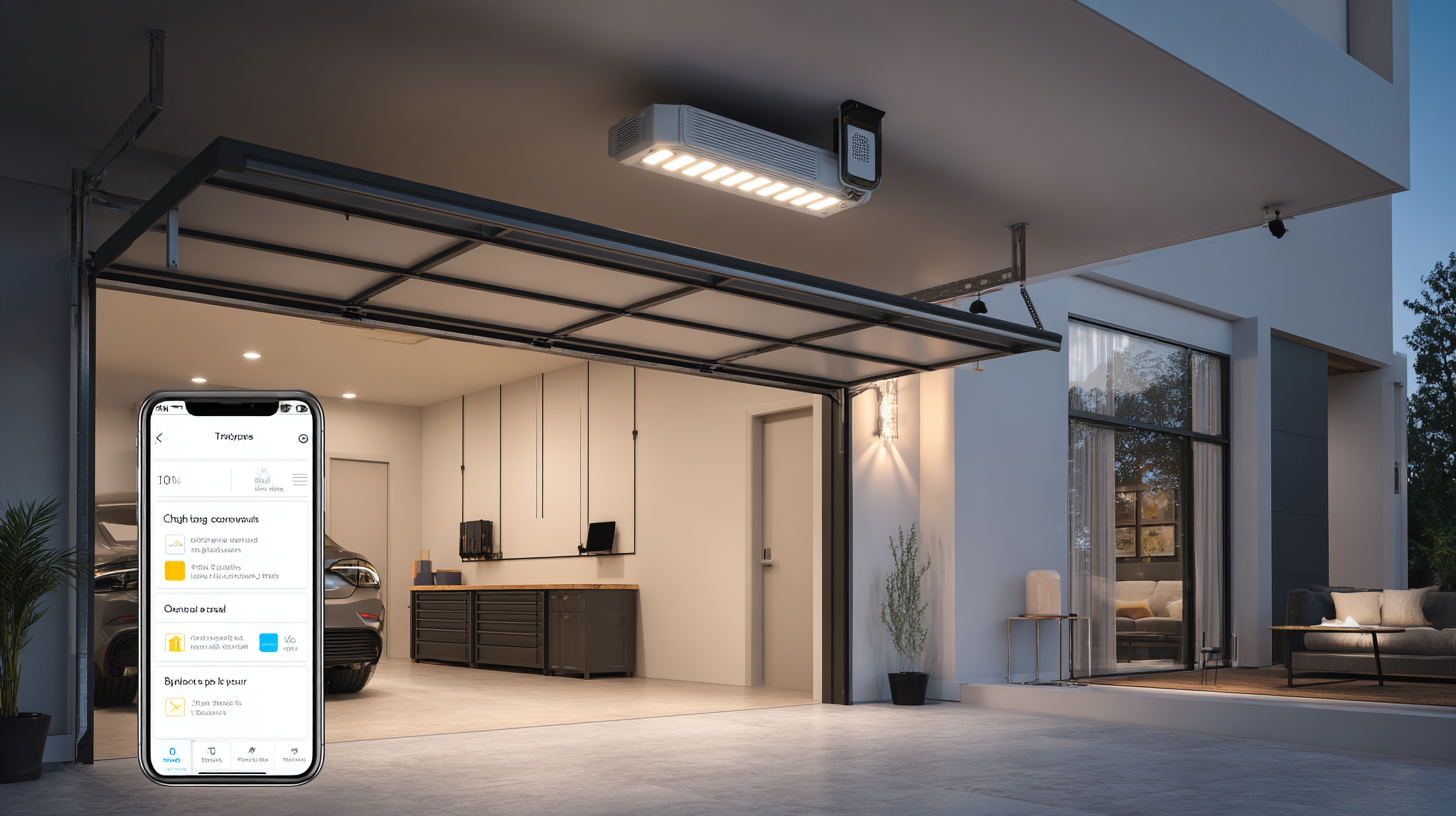
A smart opener does more than let you open the door from the car. Expect: remote access from anywhere, notifications when the door opens or stays ajar, timed or geofenced auto-close, temporary access codes for guests or delivery drivers, and integrations with cameras and home automation routines. For many homeowners these features reduce trips outside, cut missed-delivery headaches, and add a useful layer of security.

Retrofit vs full replacement — pick the right path
- Retrofit controller: Clips to your existing opener or connects to the wall button. Quick to install and budget-friendly.
- Smart-ready opener (full replace): New motor, built-in Wi‑Fi or hub support, and often better battery backup and diagnostics.
If your current opener is less than 10–12 years old and the motor runs fine, a retrofit controller is usually enough. If the motor is noisy, the unit lacks safety features, or you want integrated backup power and cameras, a full replacement pays off long term.
Key features to look for in 2025
- Connectivity: Native Wi‑Fi is convenient; Zigbee/Z‑Wave or hub support can be more reliable on busy networks.
- Security & access: Temporary access codes, session logs, and two-factor options for the account.
- Auto-close & schedules: Timed closing or geofenced rules so the door shuts when you leave or at a set hour.
- Camera integration: Onboard camera or easy pairing with a porch/garage camera for delivery confirmation.
- Battery backup: Keeps the door operational during power cuts—important if you live in an area with storms.
- Manual release & safety: Reliable manual override and modern reversal sensors to prevent accidents.
Weekend install plan — step by step
- Prep: Read the manual, measure the rail and ceiling clearance, and check door balance. Clear the floor and have a ladder ready.
- Decide retrofit or replace: If retrofitting, locate the wall button wiring. If replacing, remove the old unit per instructions.
- Mount & wire: Install the motor or retrofit module, connect to the wall switch and power (turn off power while wiring).
- Setup app & network: Connect the device to Wi‑Fi or a home automation hub, create an account and enable basic notifications.
- Calibrate limits and sensors: Test open/close limits, ensure the photoeyes align, and verify auto-reverse works.
- Test & automate: Create a closure schedule, try geofence open/close, and pair with a camera or smart light for arrival routines.
Top budget and mid-range picks (examples)
- Retrofit controllers: Wyze/Chamberlain/Meross-style garage door controllers — plug-and-play options that add phone control.
- Smart openers (full replace): Trusted brands with native app support, battery backup and secure access logs for long-term reliability.
(Check compatibility with your door type and travel rail; installation needs can vary for sectional, tilt-up, and heavy wooden doors.)
Safety and security checklist
- Always keep the manual release accessible but secured from theft.
- Change default passwords and use a unique email/account for the opener.
- Place the opener on a separate IoT SSID or VLAN where possible.
- Enable alerts for "door open" and "door left open" events.
- Test the auto-reverse sensor monthly and keep the track clear of debris.
Troubleshooting quick hits
- Door won’t close: Check photoeye alignment and remove obstructions; verify limit settings in the app.
- Slow response or flakey remote: Reboot the controller, check Wi‑Fi signal at the opener (add a Wi‑Fi extender if needed).
- False open alerts: Confirm sensors are clean and wiring is secure; review automation rules for conflicts.
Pairing ideas — make the garage part of your home flow
• Link the opener to a porch camera and set a routine: when the door opens, start a 2‑minute camera recording and switch on entry lights. • Combine the opener with your smart thermostat to reduce HVAC run while the door is open. • Use temporary access codes for cleaners or delivery drivers, and set them to expire automatically.
Where to buy & learn more on AMEPGADGET
Browse curated picks and installation kits at https://amepgadget.com/shop/garage-smart-openers, or explore related upgrades in our Smart Home Innovations hub. If you want a detailed parts checklist for a retrofit, see our step-by-step guide at Garage Retrofit Checklist.
Final thought
A smart garage door opener is one of those upgrades that pays off in daily convenience and fewer missed deliveries. Do the prep, pick the right type (retrofit vs replace), and follow the safety checks—most installs are ready in a single weekend. Installed one recently? Drop a photo or tip in the comments—we’ll feature reader installs in a future post.
0 comments